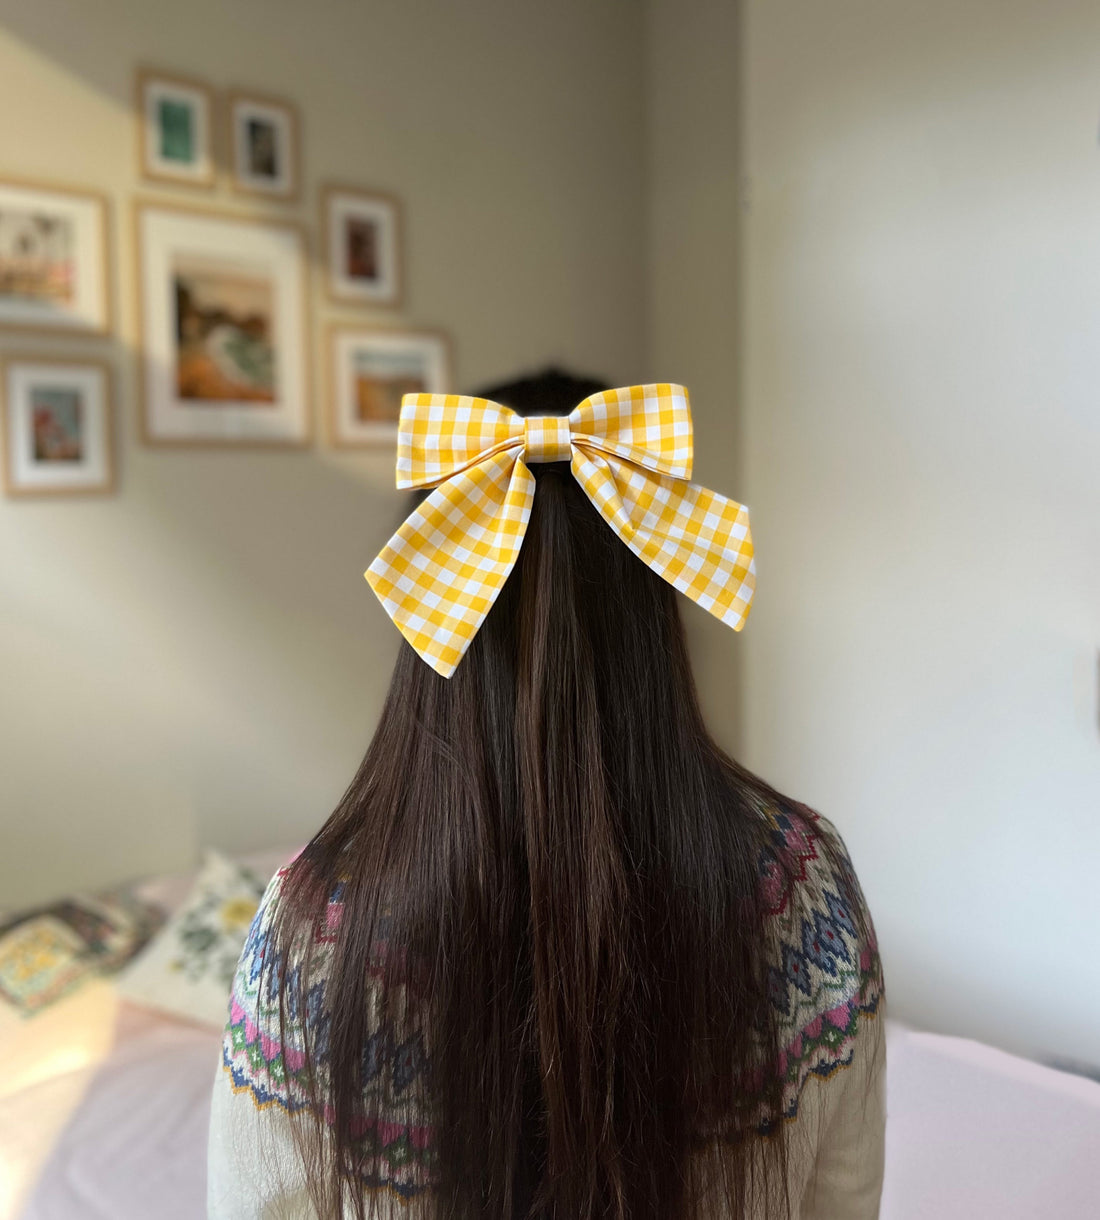
I wear these bows all the time and they are the most commented upon things I’ve ever worn! Almost every time I put one on and go out, strangers will smile at me and say, ‘I like your bow’. They are a fun and celebratory way to top off an outfit, and a wonderful way to rescue a ‘flat hair day’. Not to mention an excellent stash-buster for leftover fabric scraps. So here's how to craft your own!

You will need:
- A piece of fabric around 18 x 14.5 inches (46 x 37 cm; squarish) or 33.5 x 7.5 inches (85 x 19cm; rectangular), or a couple of decent-sized scraps. Fabric with some body/structure is a good choice – e.g. silk shantung/dupion, duchesse satin, quilting cotton, cotton velvet. For softer fabrics like cotton lawn or linen, I would definitely recommend interfacing.
- Interfacing (optional)
- A sewing machine, scissors, pins and thread
- A hair barrette
- Glue
(I'm really sorry this tutorial doesn't include more photos – that's because I'm actually preparing a full video tutorial but my computer is having a bit of meltdown this week so, watch this space...)

You can download the free pattern here. If you don’t have a home printer, these are the dimensions of the three pieces:
The bow loops are formed from a rectangle 17 x 6.5 inches (43 x 16.5 cm).
The bow ‘tie’ (the bit that goes around the middle) is a rectangle 3.5 x 5 inches (9 x 12.5 cm).
The bow tails are formed from a rectangle that starts off as 14 x 7 inches (35.5 x 18 cm), but then is curved inwards at the ends (see photo above).
Instructions
Cut out your three pattern pieces from a single layer of fabric. Depending on the fabric you’re using, you may want to give your bow additional structure by interfacing all the fabric pieces. I generally interface even the silks because I like the added body.
ALL SEAM ALLOWANCES ARE ½ INCH OR 1 CM
For the bow loops: Start by folding the piece lengthwise, right sides together. Stitch down the long raw edge, leaving a 2-inch (5cm) gap in the middle. Now start to turn your tube the right way out by pushing one end inside the tube, but stop when you’re halfway through and the pushed-through end starts to emerge at the other side. You should be able to match the raw ends of the tube together (and the right sides of the tube will be facing). Carefully stitch around the raw end of the tube, through both layers (it's fiddly but just take small steps). Now use the gap in your first line of stitching to pull the whole thing the right way out. Stitch to close the gap. Arrange the loop so the long seamline is running around the middle of the inside, and press.
For the bow tails: Fold your piece lengthwise right sides together and stitch along the three raw edges, leaving a gap of about 2 inches (5 cm) in the centre of the long edge. Trim the corners to reduce bulk and then use the gap to turn the piece the right way out. Push out the corners and press. Stitch the gap closed (actually, if I'm completely honest, sometimes I don't bother with this!).
For the bow tie: Fold your piece lengthwise, right sides together and stitch down the long raw edge to form a tube. Press the seam open and then turn the tube the right way out. Press the piece so the seam lies down the centre (this way it will be eventually be hidden).
To assemble the bow: Use the bow tie to cinch together the middles of the bow loops and bow tails, with the bow loops sitting above and over the tails. Make sure your tails have the longer side on the inside, so the ends curve up and out. Pull the bow tie tight and stitch the ends together as close to where they meet after looping around as possible. Trim off excess from the bow tie ends and press the seam open.
Check your bow loops and bow tails are arranged symmetrically and satisfactorily from the front. Now spread glue over the flat curved side of the barrette, and press it into the back of the bow, positioning the middle of the barrette in the middle of the bow tie and over the bow tie seam.
Let the glue dry and then your bow is ready to wear!

